
Make an Herbal Hoop Sachet
For many centuries, herbs have been used in craft and decoration. Not only are herbs versatile, they are almost all very easy to grow in your own garden no matter how small or large. The majority of the herbs you will use in your crafts and decorations will be dried.
Harvesting the Herbs
The following are some free or inexpensive methods for drying fresh material. The methods are basically the same: they all expose freshly harvested herbs to warm, dry, and well-ventilated air. Try to harvest before
noon on a sunny day, before the flowers have opened, and after the dew has dried off.
Remember that some herbs are difficult to separate from unused parts after they are dry and brittle so be sure to harvest the parts you need, slicing roots and stripping leaves off stems as necessary. Once you've tried to "powderize" a root that you've forgotten to slice thin before drying, you will never forget it. You may also want to rinse and pat dry your herbs, to remove any dust or dirt that collected on the herb.
The best color, flavor and scent will be retained if they are dried in darkness, whether indoors or outdoors. Some places I suggest are garages, attics, closets, under beds, and even shoeboxes (with holes
punched). Just make sure your herbs get a warm, dark, well-ventilated area to dry in and you won't have any problems.
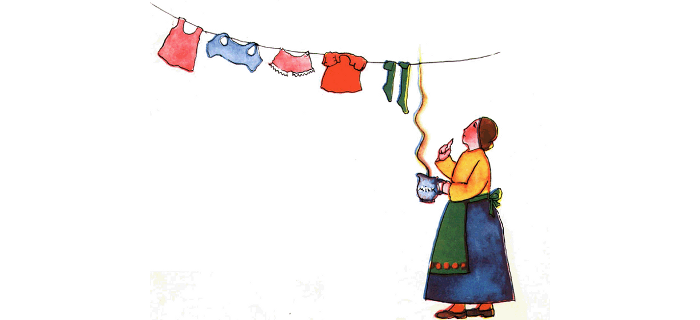
Hanging upside down to dry
By far the easiest method, upside down hanging is a technique that can be used to dry nearly all herbs.
- Harvest a small bunch of herbs with at least a few inches of stem for hanging and tie a rubber band around the stems (this will allow the band to shrink as the herb shrinks). Hook an opened paper clip onto the rubber band.
- Take a large paper bag and poke a small hole in the bottom. Poke small holes in the side of the bag as well.
- Put the herb bundle into the bag, with the banded stems nearest the hole in the paper bag. Push the paper clip thru the bag hole and hook over a clothesline.
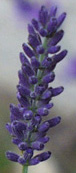
If you are drying herbs, such as lavender, with small flower buds which easily fall off when dry (in fact, that's the goal when drying lavender), be sure to hang your herbs over a clean sheet or other collector. You can also wrap cheesecloth around the bag or place the herbs in the bag with the bag bottom at the bottom to catch anything that falls. Use old sandwich bag twist ties to poke a hole in the bag top and twist tie to the rubber band so that the bag doesn't fall off. Other things to use are clothes pins, paper clips, rubber bands, etc.
Air dry on a screen or paper plate
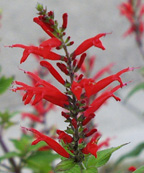
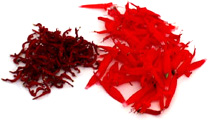
Air drying on a flat surface is a method best used with small herbs, such as flowers, berries, and seeds, but also items such as root slices. The photo here is of pineapple sage flowers in the 3 stages of drying: before harvest, harvested, and completely dried. The herb was clumped together for the photo to show size before and after drying. You will want to arrange your herb on a non-metal tray or plate so there is no overlapping for proper color and flavor retention, as well as for the prevention of molding while drying.
Place the plate in a warm, dark, ventilated place. Gently stir the herbs around once or twice a day to allow for maximum exposure to the circulating air. This method takes between 1-4 days, depending
on the moisture content of the herb and the air temperature and humidity.
Oven drying
Use this method with caution as setting the oven any higher than the absolute lowest temperature can easily destroy the herb. In fact, some ovens need only have the pilot light on overnight for adequate oven drying. Simply put your herb on a paper towel on a cookie sheet (not the old rusty one!) or in a glass pie or casserole dish in a single layer. If you wish to do multiple layers, separate the layers with paper towels. If your herbs aren't drying quickly, stir them up a bit and perhaps turn up the oven temperature a few degrees.
Microwave
Many people swear by microwaving as a drying method. I've found that unless you experiment endlessly (and wastefully) and have the perfect temperature setting brand of microwave (I don't, I have the one that came with the house, defrost and high only), it can result in bland and brown herbs. If you do want to try, place the herb between two layers of paper towel. Because of the small amount of herbs, you may want to put a small microwave safe dish of water in the microwave to avoid any machine damage. Set on high for 2 minutes and repeat as needed. If you have a newer microwave, you may actually have instructions for drying fresh material. Since there are easier (and cheaper) methods, I recommend not bothering with the microwave.
Dehydrator
A dehydrator is a great tool for "the new homemaker"...so long as you USE IT. If you plan on buying one be sure to get one with very fine mesh. This also makes it more useful for making homemade fruit roll-ups. The best temperature for drying herbs is 90-100 degrees so be sure you can set your dehydrator that low. You will need to experiment with drying times as dehydrators and herb drying times will vary dramatically.
If your craft requires color retention or an exact flavor or scent, dehydrating, sun, or oven drying can discolor and distort the original scent or flavor, and are therefore not recommended drying methods.
Storing Your Dried Herbs
It is easier if you take the useful parts of the herb off the dried plants before you store them. Some should be picked off, some will fall off, some you can shake or rub off. Don't forget to keep the leftover "unused" stems in a small raffia-tied bundle for use as kindling or for smoking food on the grill. Yum!
Dried herbs should be stored in air-tight glass containers and in a cool dark place (or in dark glass). Plastic bags may also be used, so long as they are air-tight. Metal containers are not recommended. Remember to label and date your harvest! Dried herbs should last for a few years if stored properly, with powdered herbs the exception. From my experience, powdered herbs last with full flavor and scent for only about a year. Orris root powder (used as a fixative) and some others are exceptions to this exception.
Hoop of Potpourri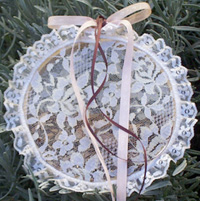 Used as a wall hanging or to scent a dresser drawer, this simple hoop full of herbs makes a delightful home decoration or gift for a special occasion.
Materials:
One 5" wooden embroidery hoop
Two 6" x 6" circles of attractive (very fine) lace fabric
2' 3/4" ruffled lace
2' 3/8" pink ribbon
2' 1/8" burgundy ribbon
White glue
1 cup of dried herbs or home grown potpourri (I like lavender
flowers and leaves with eucalyptus bark)
Steps:
- Place the lace fabric on a table.
- Glue the outside of the small hoop and place on the lace.
- Pull the lace along the glued edge, making sure it makes a tight side.
- After this half has dried, pour the potpourri directly into the hoop.
- Glue the outside of the hoop again (over the lace this time)
- Place the second lace circle over the top and tightly seal this side. Trim off excess fabric after drying.
- Place the larger hoop over the smaller hoop and screw it down nice and snug.
- Place a bead of glue along the outside of the hoop (along the crack where the hoops are together) and glue the ruffled lace trim along the edge. Cut off excess once the circle is complete.
- Tie the larger ribbon in a pretty bow around the metal screw.
- Tie the smaller ribbon around that ribbon in a pretty bow.
- Hang on a wall in a bathroom or wherever else you wish.