
Making the Perfect Pie Crust
All of the anal-retentive suggestions you have ever heard about pie crust are true, because pie dough is a very special kind of dough. It isn't hard to achieve, once you know what you're going for and why, but pie crust can still intimidate a lot of people.
When I first got back into pie making I bought the Pillsbury crusts in the refrigerator section at the store. They aren't bad, it fooled some people and gave me a chance to ease into it without having to pull off the whole thing at once (sometimes I'm such a baby). But once I learned how easy crustmaking is, I never bought the premade kind again.
What makes a pie crust good and flaky is making sure you only coat the fat with flour, not blend them, as you would with a cookie dough. This is much easier to do if the fat is very cold. When adding liquid (and it could be water, egg, even a little vinegar) you don't want it to mix in, so much as collect all the flour-coated fat particles together and make them stick to one another.
That's why less is better than more, and cold is better than warm. Colder and quicker are the watchwords with pie crust.
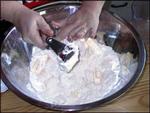
Cutting in the fat--click to see a close-up
I don't own a food processor, but if I did, I would use it to make pie dough. Why? Because the faster you mix the cold ingredients and the less you work it the better. Before electric appliances, butter was cut in using fingers, knives or a lovely little device called a pastry cutter, my previous tool of choice.
A food processor is ideal for mixing fast, as long as you don't work it too much--then it gets warm. Try pulsing, not just letting it run. I use my KitchenAid blender because Julia Child gave me the idea in a cookbook that was published in the '70's, before food processors were everywhere. It is a little faster than by hand, which has helped make my dough much more consistent.
[Because the TNH Test Labs aren't fortunate enough to own a food processor, and because Your Demonstrator is a bit of a purist, the demonstration pictures feature a pastry cutter. If anyone from KitchenAid or Cuisinart would care to donate one, we wouldn't object.--Ed.]
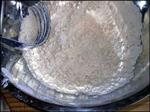
What it should look like after you're through cutting in the fat--click to see a close-up
My recipe is Martha Stewart's. It uses butter, not shortening. I'm very lazy and getting two sticks of butter out of the refrigerator is easier for me than fussing with measuring shortening. I use it for tarts and quiches, as well. But you could use any recipe. My mother used one that had an egg and a teaspoon of vinegar which also made a very tasty crust. It also used only shortening, but we've pretty much moved away from hydrogenated oils.
This recipe is from The Joy of Cooking, and is nearly identical to Martha's but for the extra 1/4 cup of shortening (added after you've cut the butter in). Butter makes a tasty dough. Shortening makes an especially flaky dough. A combination is always good. [Technically, in foo-foo kitchen terms, this kind of butter pie dough is called pâté brisée, which means "broken dough" in French--broken because of the way you cut the butter in, and the way it flakes. So now you have a new term to impress people with.--Ed.]
| Deluxe Butter Double Pie Crust | |
|---|---|
| 2 1/2 cups flour | 1 teaspoon salt |
| 1 teaspoon sugar | 1 cup cold butter, cut in small pieces |
| 1/4 cup shortening | 6 to 8 tablespoons ice cold water |
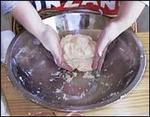
Making a ball--click to see a close-up
Chill your fat and water! This is essential.
Cut your fat into small pieces and add to your measured flour and salt (and sugar, if you use it). There is usually a little over twice as much flour as fat (by volume). Cut the fat in quickly, either with two knives, a pastry cutter or by pulsing in a food processor or blender. Your mixture should resemble coarse meal. Bigger lumps of fat are just fine; aim for pea-sized at biggest. (If you're using the The Joy of Cooking recipe above, cut in the butter first, then cut in the shortening.)
Slowly add the water--just drizzle it in--and watch closely as you work it in with the edge of a spatula or continue pulsing. It should still look dry. Grab some with your hand and squeeze. Did it hold together? Than you have enough water. If it didn't, or you're not sure, add a little more and mix quickly. Test again.
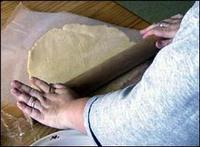
Divide the dough in half to make single crust amounts. Wrap the dough up by placing a portion of it on a piece of plastic wrap. Using the wrap, instead of your hands, push the dough into a flat disk. Refrigerate this for an hour or more.
By making a flat disk at this point you make it a little easier to roll out. A round ball would be harder to get into a nice flat piece of rolled out pastry.
Even this amount of activity has activated the gluten in the wheat (great if you're making bread, not so great when you're making pie crust). And you want it to relax before you roll it out. It is even recommended that you let rolled-out dough relax before you bake it. I do this when I have time, or am prebaking a pie shell.
Sometimes dough gets too hard in the refrigerator. If this happens to you, let it warm up a little (15 or 20 minutes) on the counter before you roll it out.
Rolling out the dough between two sheets of wax paper
This is the part that just plain takes practice. I use a lightly floured board. I add little bits of flour as I go and turn the dough frequently and I work fast. Over time you learn how much pressure to apply and when to apply it. I have also heard that putting the dough between waxed paper or plastic wrap will help avoid the sticking problem but I think this requires a certain amount of practice, too, and haven't bothered to learn it since I was successful otherwise. [Note that Your Demonstrator uses the wax paper technique since she's just been flat-out unsuccessful otherwise.--Ed.]
Begin by rolling from the middle of the disk up. Turn the dough one quarter and repeat. Always roll in one direction and turn the dough often. This also helps you avoid overworking the dough, you know, the old gluten thing again. That would create a tough pastry.
If the dough splits, just push it back together. It doesn't need to be perfectly round, just large enough to fit your pan. The recipe I have makes a generous amount and you don't need to worry about the edges, they just get cut off. In fact, the double crust recipe will make an additional single crust if I save all the scraps, which I have done on occasion.

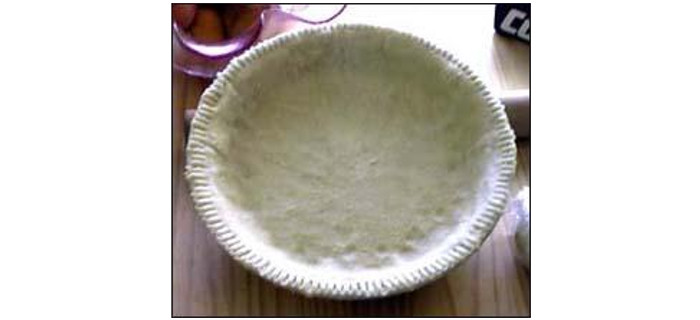
Fitting the dough into the pan
Now that you have your crust rolled out, bring your pie plate near your work surface, carefully fold the dough in half, pick it up and lay across the plate. [If you're using the wax paper method, carefully remove the top layer of paper, lie the dough on the pie plate and carefully remove the bottom layer of paper.--Ed.]
Open the dough up and gently work it into the plate. If it tears or splits, just pinch it together again, or use scraps to repair any holes. I probably still roll my dough out a little on the thick side because I want to prevent too much leakage with the fruit pies (it makes such a mess) and it is easier to crimp the edge if I have something to hold onto. Fortunately this crust is so tasty that even thick edges are delicious. Also, because it really is just my husband and I, the pie is apt to be around for a few days and I don't want the crust to get too soggy, something a very thin crust would do pretty quickly.
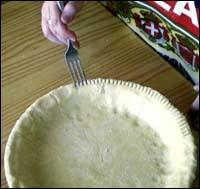
Crimping the edges
Crimp the edges either with a fork or by pinching around the edge with your fingers; your recipe may tell you to wait until you add the top crust for this step. If you're making a two-crust pie, roll out the second disk of dough in the same way and follow the recipe for your particular pie.
If I know I have some special pie baking experience ahead of me, I might make the dough the day before; then all I have to deal with is rolling out and filling the pie. This can reduce the panic, but I think I'm past that phase now. Happy pie baking!
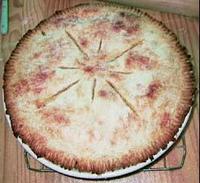 |
At this point, follow your specific pie recipe for filling and baking directions. The pie Lynn made for this demonstration was a double-crust fresh peach pie--and the first pie she's ever made that actually turned out! Boy, was it good! Since these photos were taken she's made several using Jean's instructions and several different recipes from The Joy of Cooking, and the results have been no less than spectacular every time--it's literally just a matter of practice, practice, practice. |
Jean Sutherland stays at home with her four-year-old daughter and forces her family to endure an endless regimen of home-made bread, pies, cookies and cakes. In addition she has begun cultivating a garden this year and requires her husband, daughter and teen-age step-son to cope with freshly grown vegetables in her vegetarian cooking. She hopes that the day will come when she can return to an interest in knitting and sewing but isn't holding her breath.